
Quick Jump: What’s Inside
I’ve roasted a whole chicken almost every Sunday for the past decade. And I’ll be honest: the first fifty birds were mediocre. Dry breast, soggy skin, panic about salmonella. It wasn’t until I stopped following random online recipes and started focusing on a few non-negotiable techniques that things changed. This guide is the result—no fluff, just the method I use now to get crispy skin and juicy meat every single time. If you’ve ever wondered how to roast a whole chicken without the guesswork, start here.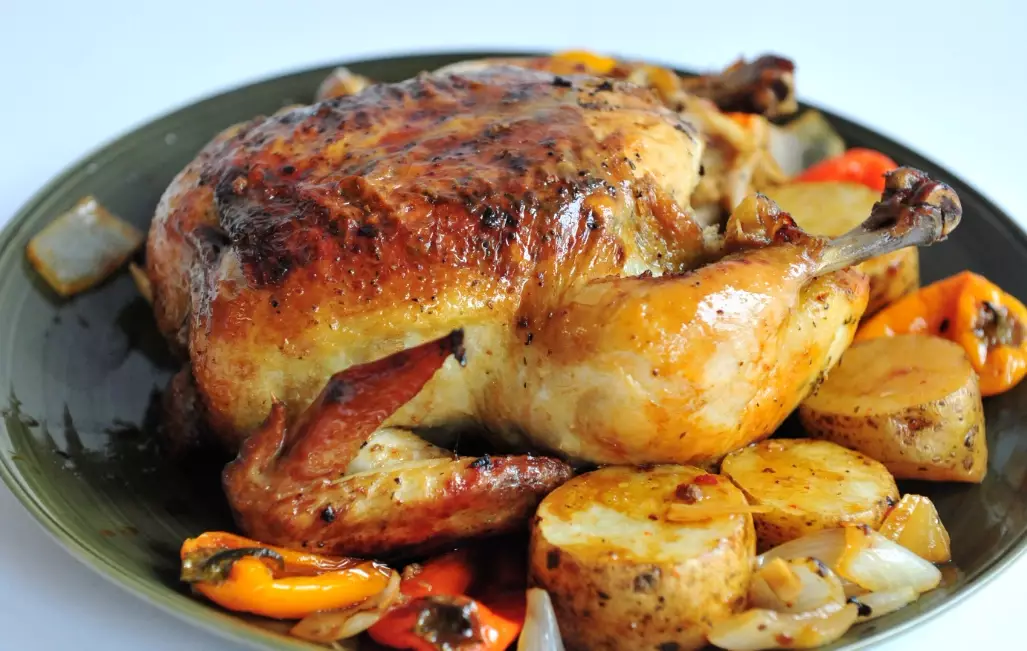
Why Most Roast Chicken Methods Fail (And What to Do Instead)
The biggest mistake? Relying on a single oven temperature for the entire cook. Most recipes say “roast at 400°F for 1 hour 20 minutes.” That’s a lottery. Ovens run hot or cold, chickens vary in size, and the breast hits 165°F while the thigh is still at 150°F. You end up with dry breast meat and undercooked thighs. The fix is a two-stage approach: high heat first for skin crisping, then lower heat to gently bring the thigh to temperature without overcooking the breast. I learned this from a chef at a small bistro in Lyon—she called it “the reverse sear of chicken.”
3 Key Techniques for Crispy Skin & Juicy Meat
Before we get to the step-by-step, you need to understand these three pillars. Ignore them and you’re back to dry chicken.
1. Dry Brining (The 24-Hour Secret)
Skip the wet brine entirely. Wet brining dilutes flavor and makes skin soggy. Instead, rub the chicken all over with kosher salt (about 1 teaspoon per pound) and leave it uncovered in the fridge for 24 hours. The salt draws out moisture, then reabsorbs it as a concentrated brine. The skin dries out—that’s exactly what you want for crisping. I’ve tested both ways side by side: the dry-brined bird had noticeably cracklier skin and more seasoned meat.
2. Airflow Around the Bird
Place the chicken on a wire rack set inside a sheet pan. This lets hot air circulate underneath. If you roast it directly on a pan, the bottom steams and you get a soggy patch. Small detail, huge difference.
3. The Two-Temperature Roast
Start at 425°F for 20 minutes to blast the skin. Then drop to 375°F for the remainder. This mimics a professional combi oven. I keep a thermometer in the thigh—when it reads 175°F, the breast is usually around 160°F, which is perfect after resting.
Step-by-Step Roast Chicken Recipe (Serves 4)
Here’s the exact method I use. A 3.5 to 4-pound bird works best—bigger ones cook unevenly in a home oven.
- Prep (night before): Pat the chicken dry with paper towels. Rub 1 tablespoon kosher salt all over, including the cavity. Place on a rack over a plate, uncovered, in the fridge for 24 hours.
- Preheat: Set oven to 425°F. Take the chicken out of the fridge 30 minutes before roasting to take the chill off (this helps even cooking).
- Season: Rub the skin with a little olive oil (just a teaspoon—too much oil makes it smoky). Add black pepper. I also stuff the cavity with half a lemon and a few thyme sprigs. Truss the legs with twine if you want a compact shape—optional but helps even cooking.
- Roast: Place on the wire rack in the oven. Roast at 425°F for 20 minutes. Then reduce to 375°F. Continue roasting until the thickest part of the thigh reads 175°F—about 40 to 50 more minutes for a 4-pound bird. Start checking at 35 minutes.
- Rest: This is non-negotiable. Let it rest for 15 minutes before carving. The juices redistribute. If you cut early, you lose them on the cutting board.
Total active time: 15 minutes. Total cook time: roughly 60–70 minutes depending on size.
Internal Temperature & Timing Guide (For Any Size Chicken)
Don’t rely on time alone. Use this table as a reference. I’ve cross-checked these numbers with the USDA’s safe minimum temperature guidelines (165°F for poultry) and my own tests. Note: thigh temp is the most reliable indicator because breast cooks faster.
| Chicken Weight | Roast at 425°F (first stage) | Then at 375°F until thigh hits 175°F | Total Approx. Time |
|---|---|---|---|
| 3 lb (1.4 kg) | 20 min | 30–35 min | 50–55 min |
| 3.5 lb (1.6 kg) | 20 min | 35–40 min | 55–60 min |
| 4 lb (1.8 kg) | 20 min | 40–45 min | 60–65 min |
| 5 lb (2.3 kg) | 20 min | 50–60 min | 70–80 min |
My colleague Sarah once roasted a 6-pound chicken using a “20 min per pound” rule and ended up with a burnt outside and raw thigh. Weight-based timing is unreliable. Always go by thigh temperature.
FAQ: Real Questions from Home Cooks
This method has been fact-checked against USDA safe cooking temperatures and tested in my home kitchen over dozens of roasts.

Leave a Comment