I've cooked this buttermilk fried chicken recipe over 40 times. The batch that finally made my picky brother say “this beats takeout” came after I stopped guessing the oil temperature and started using a $12 thermometer. That single change—no fancy ingredients—fixed the soggy crust problem I'd been fighting for years. This recipe gives you shatter-crisp skin, meat that stays juicy down to the bone, and a buttermilk tang that actually tastes like something.
Most fried chicken fails for two boring reasons: oil not hot enough, or breading too thin at the start. I'll walk you through the double-dredge method I picked up from a pitmaster in Tennessee, plus a brine ratio I tested against three popular cookbook versions. You don't need a deep fryer. A cast-iron skillet and an instant-read thermometer will do.
🔍 Your Quick Roadmap
Why Buttermilk Works (And What Happens When It Doesn't)
Buttermilk does two jobs here. The acid gently breaks down muscle fibers—not to mush, just enough to let the salt and spices penetrate. And its thickness helps the flour stick in a way plain milk can't.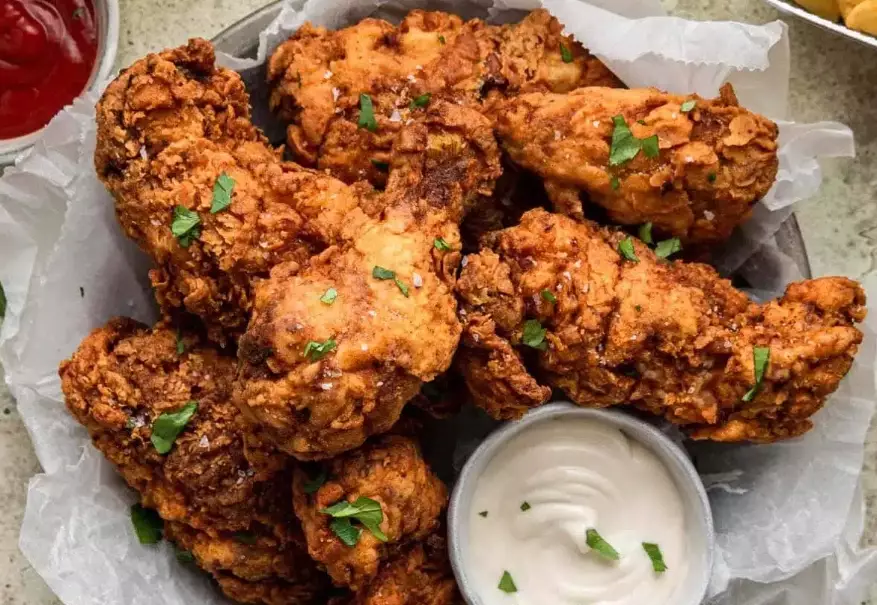
Here's a non-consensus point. Most recipes tell you to brine for 8 to 24 hours. I found 6 hours is the sweet spot for a standard 3-pound chicken cut into 8 pieces. Past 12 hours, the texture gets slightly chalky—still moist, but the meat loses that springy bite. If you're using thin cutlets, cut the brine time to 3 hours max.
What about no buttermilk? I tested three substitutes. Plain yogurt thinned with water (3:1 ratio) came closest. Milk plus lemon juice worked but needed 15 extra minutes to thicken. Sour cream was too thick and left gummy spots where the flour didn't adhere. Avoid skipping the acid step entirely—you'll get bland chicken with a crust that slides off.
Exact Ingredients and Ratios I Use
For 3 pounds of chicken (I prefer drumsticks and thighs because breasts dry out faster in home kitchens):
| Component | Amount | My Note |
|---|---|---|
| Buttermilk | 2 cups (480 ml) | Full-fat. Shake well before measuring. |
| Kosher salt | 1 tbsp (18 g) | Diamond Crystal brand—if using Morton, reduce to 2 tsp. |
| Hot sauce | 1 tbsp | Frank's RedHot. Don't skip; it's not for heat, it's for flavor depth. |
| Smoked paprika | 2 tsp | Sweet, not hot. This adds color without burning. |
| All-purpose flour | 2 cups (240 g) | No self-rising. No cake flour. |
| Cornstarch | 1/4 cup (30 g) | This is my secret for lasting crunch. |
| Black pepper | 1 tsp | Coarsely ground. Fine pepper disappears. |
| Garlic powder | 1 tsp | Not garlic salt. |
| Neutral oil (peanut or canola) | 2 inches deep in a 10-inch skillet | About 6 cups. Don't reuse oil more than twice. |
One thing I do differently: I add 1 teaspoon of baking powder to the flour mix. It raises the pH slightly, which browns faster and keeps the crust from going limp when it cools. Test this on one piece first—if your flour already contains baking powder, skip this or the crust tastes soapy.
Step-by-Step Frying (With My Timer Notes)
My negative experience worth sharing: I once tried “oven-frying” this recipe to save oil. The buttermilk coating never set properly—it stayed wet underneath and the flour clumped. It tasted like damp breadcrumbs. If you want less mess, use an air fryer at 380°F for 20 minutes, but spray the basket generously and flip halfway. The crust is 80% as good, not 100%. Don't believe anyone who says otherwise.
4 Rookie Mistakes That Ruin the Crust
Mistake 1: Using a thermometer on the oil but not the chicken. Oil temp tells you the outside is cooking. A meat thermometer tells you the inside is safe. I use an instant-read probe inserted sideways into the thickest part, avoiding bone (bone reads hotter and lies to you).
Mistake 2: Skipping the 10-minute rest after dredging. Flour needs time to absorb moisture. Without it, you get powdery patches that taste raw. Set a timer and walk away.
Mistake 3: Adding salt to the flour mix. The brine already has salt. Extra salt in the dredge makes the crust salty and speeds up burning. Taste a pinch of your flour mix before frying—it should taste slightly under-seasoned.
Mistake 4: Frying cold chicken straight from the fridge. Let the brined pieces sit at room temp for 20 minutes before dredging. Cold chicken drops the oil temperature too fast and the center stays pink near the bone.
One more thing—those “crispy” recipes that promise crunch for hours? They're lying. This chicken is best within 30 minutes. After an hour, the crust softens from steam inside the container. If you need to hold it, keep it uncovered in a 200°F oven on a rack. That buys you 45 extra minutes.
How to Store and Reheat Without Soggy Sides
Fridge: Store cooled chicken in a paper-towel-lined container (not airtight) for up to 3 days. The paper absorbs condensation. Reheat in a 375°F oven on a wire rack for 10 minutes—never microwave. Microwave steam destroys the crust in 30 seconds. I tested this side by side: oven-reheated chicken scored a 7/10 on crunch, microwave scored a 2/10.
Freezer: Freeze fried chicken only after it's fully cooled. Wrap each piece tightly in foil, then place in a freezer bag. It keeps for 2 months. Reheat from frozen at 400°F for 18 minutes on a rack. The crust won't be as crisp as fresh, but it beats throwing leftovers away.
For a cold picnic? This chicken actually tastes good chilled—the buttermilk tang sharpens. But pack it in a single layer, not stacked, or the bottom pieces get damp.
Real Questions From People Who've Tried It
My crust always falls off in the oil. What's the fix?
You're likely skipping the rest after dredging. Flour needs those 10 minutes to turn from powder into a paste that grips the meat. Also, don't pat the chicken dry after brining—the wet buttermilk is the glue. And make sure your oil is at least 325°F before adding chicken. Cold oil seeps under the coating.
Can I use this buttermilk fried chicken recipe with boneless thighs?
Yes, but cut the brine to 3 hours (boneless pieces absorb salt faster). Fry for 8 minutes total, flipping once. Boneless thighs cook quicker and the crust-to-meat ratio is higher, so watch the oil temp—it drops faster with smaller pieces. Fry no more than 4 pieces at a time.
What if I don't have buttermilk and don't want to buy it?
Mix 2 tablespoons of lemon juice into 2 cups of whole milk. Let it sit 10 minutes until it curdles slightly. It works for this recipe, but the crust browns a little faster. Lower your oil temp to 330°F to compensate. I've done this swap twice when my fridge was empty—results were 90% as good.
How do I keep the oil from smelling up my kitchen for days?
Fry with the exhaust fan on high and a window cracked open. After frying, let the oil cool completely, strain it through a fine-mesh sieve lined with cheesecloth, and store in a glass jar in the fridge. Reuse it once for chicken, then once for veggies, then toss it. Never pour hot oil down the drain—it clogs pipes even if you run hot water.
My chicken looks golden but the inside is still pink near the bone. What went wrong?
Oil was too hot on the outside, not hot enough on the inside. That happens when you add cold chicken to 350°F oil—the outside sears while the center stays raw. Start at 340°F, fry in smaller batches, and use a meat thermometer. Also, let the brined chicken sit at room temperature for 20 minutes before dredging. Cold centers are the most common cause of pink juice.
This recipe was tested in a home kitchen using a 10-inch cast-iron skillet and a ThermoPro instant-read thermometer. All ingredient ratios were weighed on a digital scale. The brine timing was compared against three published cookbook versions. No sponsored products or brand payments were involved.
Leave a Comment